Posts tagged as prototyping
Process Notes: Jigs and Things
12 March 2024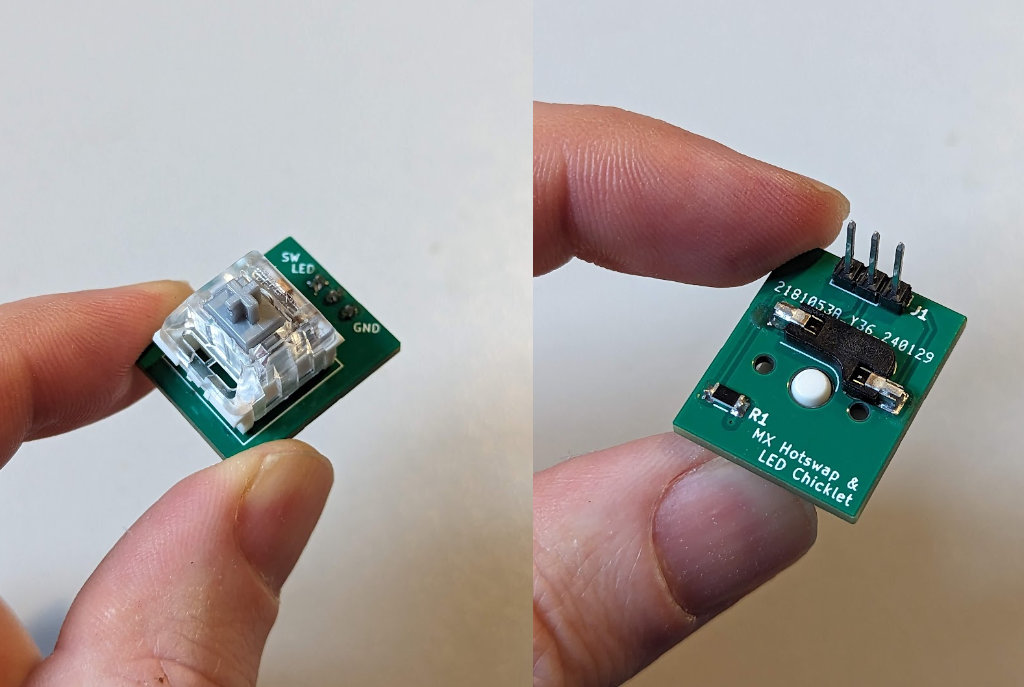
This is a recent prototype.
It’s a custom PCB that takes a single Cherry MX style keyswitch, with a resistor and an LED positioned to illuminate the keycap, broken out to pins. That’s it.
It’s part of a larger prototype, that involves buttons and controls and many chips. For a while now I’ve taken to prototyping quite large electronics projects in their full, final form. That means getting a large board made, fully populated with all parts, and then debugging it. It should work first time, but that’s not always the case, and a mistake can mean another costly revision.
This project has more unknowns in it than normal: new parts (like these keyswitches); new ICs; a UI that is still very much up in the air (and involves keys, knobs, and chording). So I’m prototyping it on a breadboard to begin with.
Breadboards often mean a lot of dangling jumper wires and bare components. But making small custom modules like the keyswitch module above can make your life a lot easier. In this case, ten small prototype boards to hold a single key were a few pounds in a recent larger order of PCBs. I’ve used hot-swap sockets so I can re-use the switches themselves in later work. The passive parts and pinheader cost pennies.
But: now I’ve got ten light-up mechanical keys to prototype with, and to reuse in later prototypes.
The keyswitch board is a particular kind of prototype that I build a lot, whether it’s in hardware or software: a small reusable atom, beyond bare wires, but not of use on its own. Crucially: it’s just for me. It might have utility to somebody else, but that’s by coincidence, not design. As a module, it’s not quite like the development boards in my prototyping drawer from firms like Adafruit and Sparkfun. It’s a more low-level building block.
I usually call these kind of things test harnesses or jigs. Here’s another jig, perhaps a more traditional use of the term:
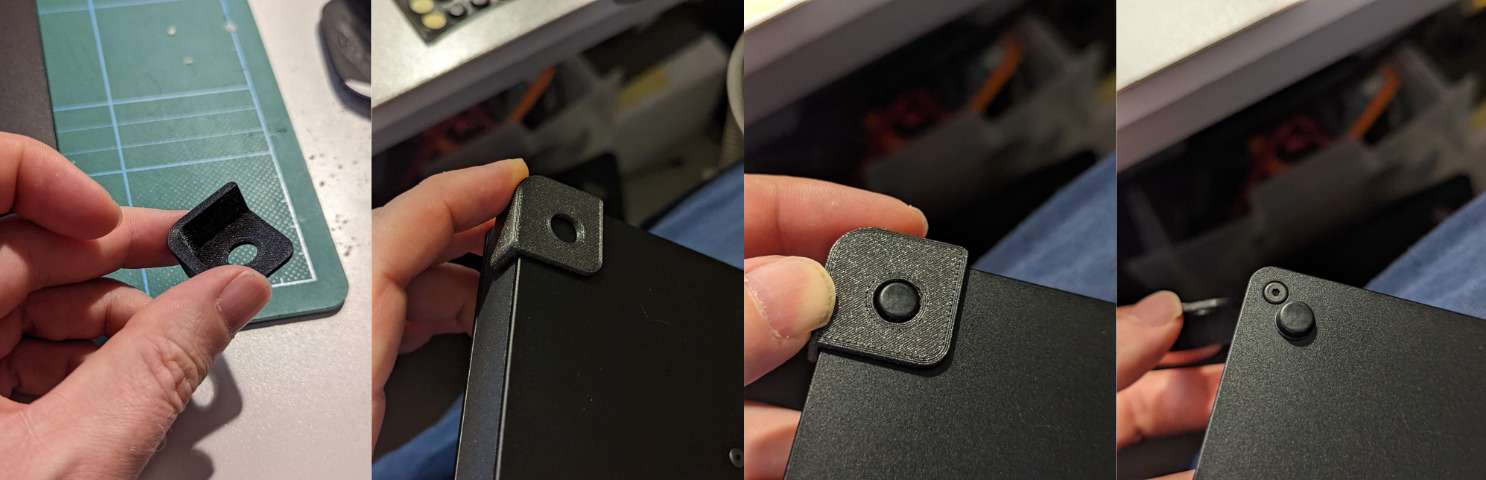
This is a small 3D printed jig that assists me in placing an adhesive rubber foot in the correct spacing away from the corner of an object.
It took a few minutes to design - project the outline of the object, define an offset, extrude upwards, a quick subtraction - and about 15 minutes to print. It does one job, for one particular project, but it made positioning 28 rubber feet quick and repeatable.
Making a thing is usually about also making the tools to make a thing. Test suites; continuous integration; preview renders; alignment jigs. They’re as much part of the process as making the thing itself, and they are objects that show the growing understanding of the current act of making: you have understood the work well enough to know what tool you need next to make it; to know what tool you need next to think with. Making is thinking.
The switch jigs helped me understand how many buttons I’d need, what it’d be like if they could light up, whether it’d be useful to have a ‘partially lit’ state. They also helped me do this work without wasting money on permanently soldered switches. The foot jig came out of need: I had placed enough feet by hand to know that a more professional outcome could be achieved in half an hour of CAD and modelling, time that would be somewhat recovered by the quicker, more professional alignment process.
I love making tools. I particularly love making tools for other people to use and create with. But to only celebrate that kind of toolmaking obscures a more important kind: the ongoing, ephemeral toolmaking that is part of making anything. Making A Tool is not a ‘special’ act; people do it all the time. I think it’s important to celebrate the value of all the tools and jigs and harnesses that are essential to the things we make… and that also are inevitably thrown away or abandoned when the thing they enable comes into the world.
They’re process artefacts: important on the journey, irrelevant at the destination. I have drawers and project boxes and directories and repositories full of them, for all manner of projects - whether they are made of hardware, or software, or ideas, or words. They seemed like a good subject for some Process Notes.
Worknotes: end of 2023 wrap-up
8 January 20242023 was frustratingly fallow, despite all best efforts. Needless to say, not just for me - the technology market has seen lay-offs and funding cutbacks and everything has been squeezed. But after a quiet few months, the end of 2023 got very busy, and there’s been a few different projects going on that I wanted to acknowledge. It looks like these will largely be drawing to a close in early 2024, so I’ll be putting feelers out around February. I reckon. In the meantime, several things going on to close out the year, all at various stages:
Lunar Design Project
After working on the LED interaction test harness for Lunar, I kicked off another slightly larger project with them in the late autumn. It’s a little more of an exploratory design project - looking at ways of representing live data - and that’s going to roll into early 2024. More to say when we have something to show - but for now it’s a real sweetspot for me of code, data, design, and sound.
Web development project “C”
More work in progress here: a contract working on a existing product to deliver some features and integrations for early 2024. Returning to the Ruby landscape for a bit, with a great little team, and a nice solid codebase to build on. Lots of nitty-gritty around integrating with other platforms’ APIs. This is likely to wrap up in early 2024.
This and the Lunar project were primary focuses for November and December 2023.
Nothing Prototyping Project
Kicking off in December, and running into January 2024: a small prototyping project with the folks at Nothing.
AI Clock
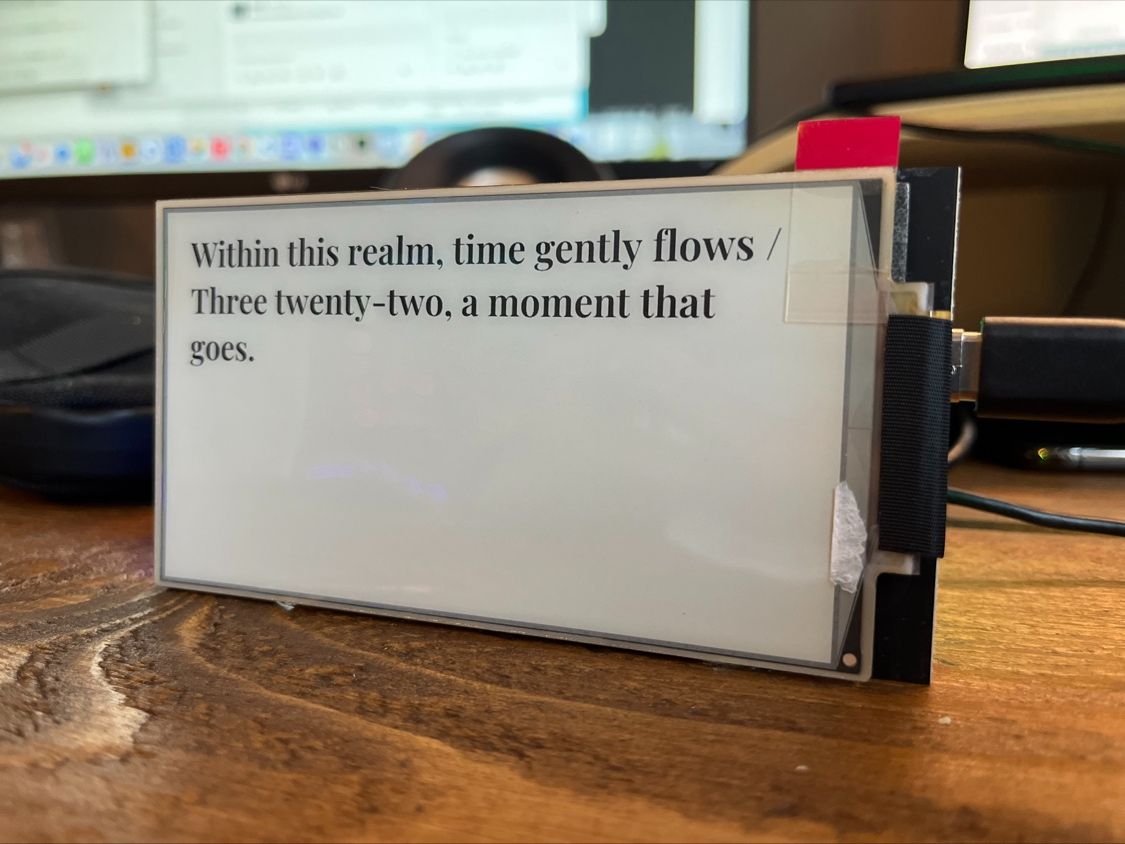
A short piece of work for Matt Webb to get the AI Clock firmware I worked on in the summer up and running on the production hardware platform. The nuances of individual e-ink devices and drivers made for the bulk of the work here. Matt shared the above image of the code running on his hardware at the end of the year; still after all these years of doing this sort of thing, it’s always satisfying to see somebody else pushing your code live successfully.
Four projects made the end of 2023 a real sprint to the finish; the winter break was very welcome. These projects should be coming into land in the coming weeks, which means it’s time start looking at what 2024 really looks like come February.
Worknotes for March 2021: 'What is this prototype for?'
23 March 2021Last week I sent all the files necessary to build the first draft at my Ilkley prototype to China. That means the plotting files to make the circuit boards, the list of all the components on them, the positions of all the components. The factory’s going to make the circuit boards and attach most of the components for me.
This is good, because many of the components are tiny.
The Ilkley prototype is on two boards: a ‘brain’ board that contains the microcontroller and almost all the electronics, and a separate ‘control’ board that is just some IO and inputs - knobs, buttons. I am focusing on the brain right now: its “revision A” board is the right size and shape to go in our housing; the current prototype of the control board is just designed to sit on my desk.
About six hours after I sent it all off, I got an email: I’d designed around the wrong sized part. (I’d picked a 3mmx3mm QFN part instead of a 4mm square part, because that’s what had been auto-selected by the component library). This meant they couldn’t place the part on the board: it wouldn’t fit.
“Should we ignore the part and go ahead with assembly?“
At this point blood rushes to my head. That part is one of the reasons I’m not building it myself: it’s not really possibly to attach with a soldering iron, and I don’t have a better tool available at home. So maybe I should quickly redesign around the right part? I hammered out a new design in Kicad.
But now I’d have to send new files, new placements over, and probably start the order again. This was going to add delays, might not even be accepted by the fabricator, and so on.
Deep breath.
At this point, I took a step back, and had a cup of tea.
Over said tea, I made myself answer the question: what was this prototype for?
Was it only to test the functionality of that single chip that couldn’t be placed? The answer, of course, was no. There were lots of things it evaluated, and lots of things that could still be evaluated:
- many other sub-circuits - notably, a battery charger, a second amplifier, a mixer
- the integration with the ‘control board’ and the feasibility of my ribbon-cable prototype
- how several parts ended up being fitted, which the fabricator has not used for me before
- the fit/finish inside our final enclosure
- not to mention whether I’d made any other mistakes on the board.
So far on Ilkley, we have been lucky: every single first revision of our hardware’s worked. This doesn’t mean we’re brilliant at everything; it means nothing more than that we’re in credit with the gods of hardware. Something will go wrong at some point - that’s what
revision Bis for. All that had happened was I’d hit my first big snag.Prototypes aren’t about answering every question, but they’re rarely also about answering one. I usually teach people to scope them by being able to answer the question what is being prototyped here? - the goal being to understand what’s in scope and what is not. Temporarily, in the panic of a 4am email from China, I forgot to answer that question myself. It was good to be reminded how many variables were at play in that Revision A, if only to acknowledge how many things I have going on with that board.
I wrote back to the factory; ignore the part and proceed. We’d still learn a lot from the prototype, and revision B would contain, at a minimum, a new footprint for that 4mm QFN chip. I saved the hasty changes I’d made to the circuit board after the email in a new branch called
revision_b- which I’d return to working on once the final boards arrived.