Posts tagged as electronics
16nx, and the value of giving work away
27 January 2025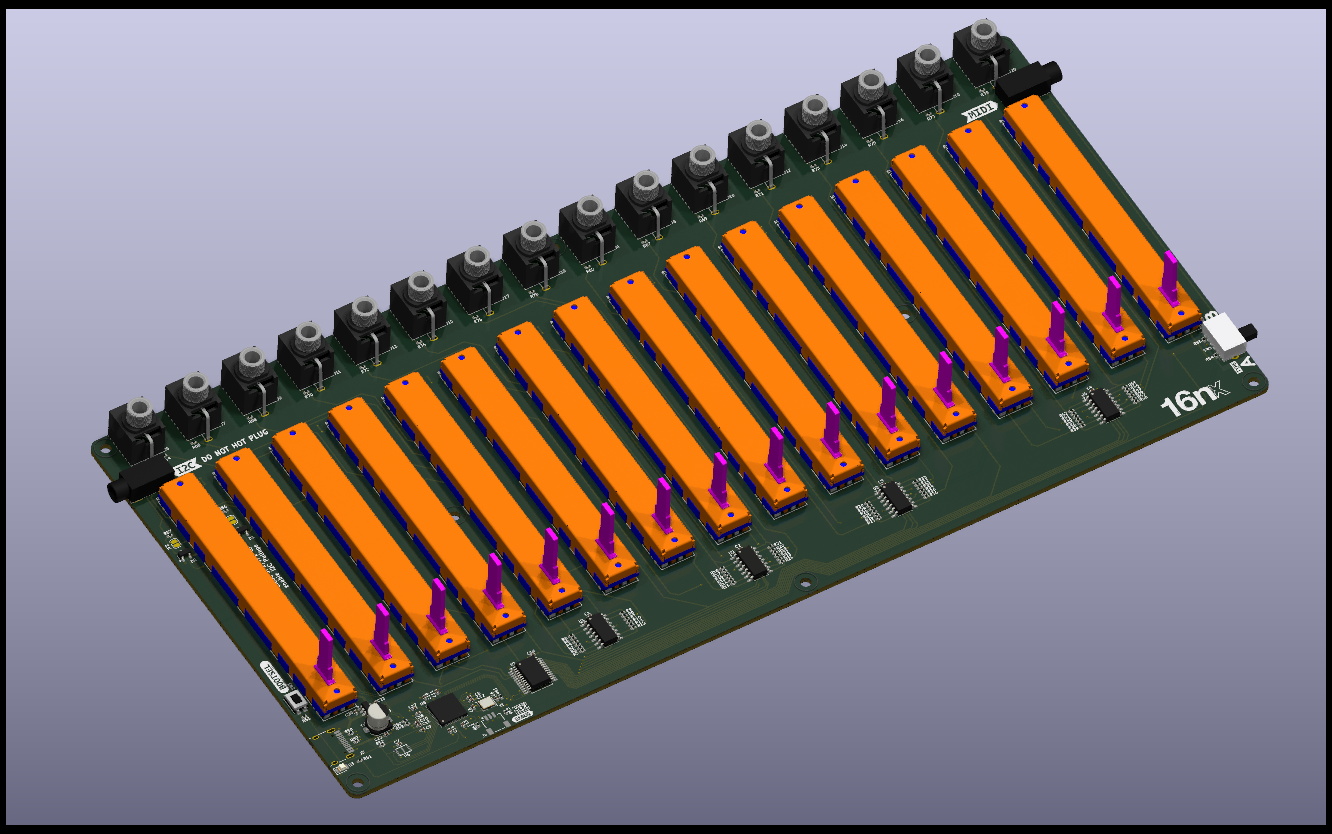
In September this year, I released a new version of the open source 16-fader MIDI controller I maintain - 16nx. This was a complete redesign of the hardware of the device, and as a result, also a completely new firmware.
Redesigning the device was in one sense, a necessity. 16n - the original faderbank - was designed around the Teensy 3.2, a microcontroller development board that had effectively become end-of-life, and was no longer available. Given that, it was impossible to make the device. If it was to be buildable again, it would need designing around a new part.
If I was going to take on the necessity of a redesign, I may as well also take up the opportunity to make changes or improvements, particularly based on what I’d learned in the years since I’d made those original designs.
I eventually released the project in September 2024 under the same open-source licences as its predecessor. As well as examining the changes in this new version, I wanted to write a little about why I’d give my work away.
The easiest approach to replacing the Teensy 3.2 would be to use its successor, the Teensy 4 - mechanically identical, it’d just take a software rewrite. But it’s vastly overpowered for the relatively simple tasks the 16n does.
And I didn’t really want a drop-in replacement. I was going to redesign the electronics anyway; I had a few goals for them:
- update the analog electronics to improve the control voltage (CV) outputs.
- get rid of the horizontal jacks on the front and rear, to make it easier to push flat against stuff. Connections would just be on the left, right, and top surface.
- change the USB connector to a more robust USB-C connector.
And if I’m redesigning the analog circuitry, maybe a more thorough redesign was in order.
Since I’d designed 16n, small-scale overseas electronics manufacture had become even easier. Assembly of boards, particularly via pick-and-place for surface mount components, was now very accessible and relatively affordable.
The original 16n was a combination of through-hole and large surface-mount components, designed for manual assembly. But in reality, even the chunky surface-mount I’d chosen to go with was fiddly for many people assembling it; the number of bugs that came down to mis-soldered resistors was quite high.
So I had an idea: perhaps all the electronics, including the microcontroller, could be on the board, and assembled in a factory. Save the manual soldering for the chunky through-hole components DIYers are happiest with, and let a pick-and-place do the rest - with cheaper, smaller components. (Tom at Music Thing Modular had already had success with this “easy-bake” approach; it turned out people don’t have to make absolutely every part of something to still get the pleasure of making something).
The project could still be open source, but for people who didn’t want to wrestle with PCBA, I could… sell these “motherboards” myself - maybe to individuals, but perhaps, more likely, to the small manufacturers who assembled faderbanks for clients.
I was attracted to this idea: the project would be easier to assemble, more robust (and less prone to assembly error by hobbyists), and I might see some ROI on the project I’d put so much effort into.
I’d base this new board around the RP2040 chip I was using for so much work now - £1 for the bare chip, a dollar or two for the rest of the required components. It’s far more powerful than low-end 8-but Arduinos, not quite as meaty as a Teensy 3.2 or 4.0, but more powerful than a Teensy LC. And its UF2 bootloader - letting users update their firmware just by copying a file on their desktop - would make end-user firmware upgrades even easier than before, a huge accessibility win.
I wrote the firmware the native C++ Pico SDK. The impact for the end-user was low - they’d get UF2s to upload - but for me was high, letting me work with a powerful toolset and a genuine debugger. I even added a mini JST connector to the board, designed to connect to the official Pico Debug Probe. It was a great help in developing the project, and felt like a good gesture to end users - you should try this approach, there’s a socket ready for you, it works with the official tools.
The trade-off to moving to Pico SDK was that the firmware would get a little less accessible for the hobbyist market. The Teensy project was written in Arduino. When I was working on that, I believed that the more people could contribute to the project, the better, so using a framework popular with makers was important. What I found out was that whilst a lot of people want to contribute bug reports or feature requests, far fewer of them wish to hack on them. No matter how much I would write, sincerely, “that sounds like a great first issue - why don’t you look at that?”, I received relatively few pull requests or forks of the firmware. So I decided to stop making choices about platforms based on what other people might do in the future, and instead choose what I thought was best.
In the end, the assembled 16nx main boards, excluding jacks, switches, and faders, would cost about a third of the equivalent parts - unassembled - for the 16n. And that’s before you consider any savings in terms of how much faster it is to assemble a 16nx - there’s no longer about 60 surface-mount chips and resistors to put on the board by hand.
The electronics redesign took a good while. 16n had been designed inside EAGLE, which was now also end-of-life, and had been subsumed inside Fusion 360 - a good product, but hardly hobbyist-budget. An open source tool made sense for an open source project, so I designed it all inside KiCad - my ECAD tool of choice - keeping the same physical form factor. The layout took a few passes to get right, mainly down to all the routing around the MCU:
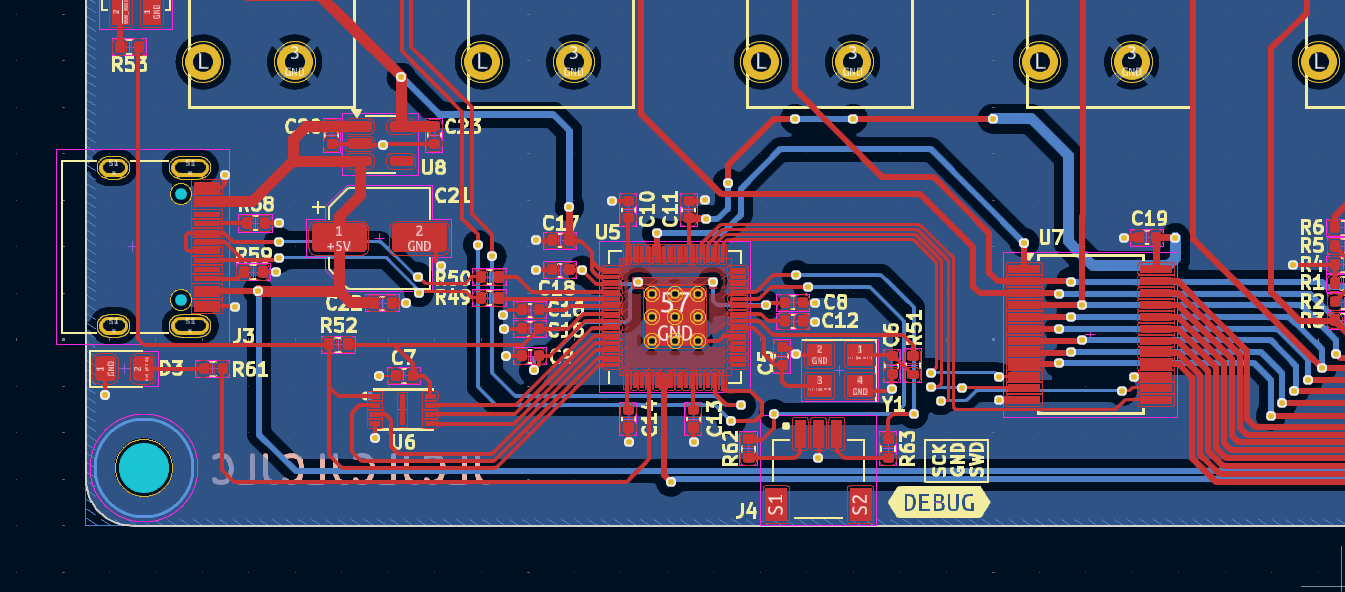 The 16nx PCB layout around the RP2040
16n at the time was the most complex thing I’d ever routed. It’s a sign of where I’ve gone since that 16nx isn’t - just - but I’m still very proud of the electronics work on it.
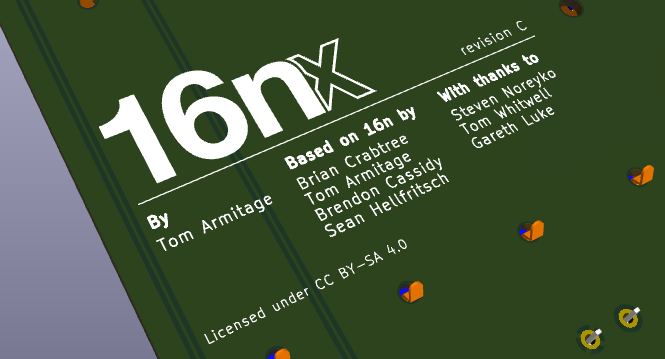
I also spent some time messing around with logos, designing things that would silkscreen nicely with a little inspiration from 90s music hardware…
 A render of the board reverse
With the firmware written, and test boards on my desk, it was time to bring it into the world.
And then… I froze.
I’d fixated on the “selling populated boards” idea as a way of generating a bit of revenue without making “full kits”, or going near sales and support of finished products. I know what I enjoy - and what I don’t - and I find support for end-users stressful (whether or not the support overhead actually materialises - the idea alone gets to me). This other approach would be less stressful than selling complete products, but still find a way for generating ROI.
But I kept getting stuck in a train of thought:
- I don’t want to do customer support at all, really. It’s bad for my brain and stress levels. Even supporting the assemblers/manufacturers I sell to might still be a pressure I wouldn’t like.
- I know enough to know I probably ought to do some form EM testing, even for a bare board. EM testing in the hobbyist industry is uneven, but do I want to take the risk of working out if I’m selling a “partial assembly” or not, and do I want to sell it on, knowing that? Conversely: will EM testing knock any margin on the head?
- This is beginning to look like a lot of work.
- What did I want out of this again?
And the answer is: I want it cheaper, and easier to make, and back in the world again for music makers, and actually, making a small amount of money probably wasn’t my highest priority.
Making a small amount of money would be more expensive, probably, than making no money.
The project was always going to be open source - it’s under an attribution licence that allows commercial derivatives. I wasn’t choosing between an open-source release, and a commercial one. But I was choosing between revenue, and not.
On my birthday, in September 2024, I published the updated 16n website, and made the first open-source release. I igave up on the idea of selling anything; easier to let people who wanted one find a way to bring it to life, just as they had done before. My main goals were met: the faderbank was back in the world, it was now possible to make one again, and it was a bit better designed, even if it did nothing new. It was quite satisfying to quell any “Gear Acquisition Syndrome” with the simple lines in the documentation:
If you already have a 16n that works: you will gain nothing by upgrading. If, however, you’re looking to acquire a faderbank in 2024+, then 16nx is your best route to do so.
There’s a long thread about it on Lines, the spiritual home of the project, and it was once again exciting to see people bringing them to life without me and enjoying the experience. That’s not nothing; I’m proud and buoyed by the response to the project.
It’s not really a “loss” in the slightest. I’ve got a great deal out of the project over the years:
- developing skills and techniques, even within tools I know well.
- facilitating new paying work: the recent Lunar hardware project wouldn’t have been doable without this, and made about as much as I’d have made trying to sell ~100 motherboards.
- building new clients: 16n led to a custom commission from a US composer that ended being a lovely project and a good working relationship.
- the value, to me, of contributing back to a community I care about of musicians and DIY makers.
When I made the decision to give it away, what I felt was relief. It turned out I was agonising over a commercial idea that wasn’t really worth enough to me, and giving that up freed me up in a lot of ways. The final release was smooth and straightforward after that.
Since launch, I’ve largely just let people get on with making them, dropping into Github or forum threads to offer some advice, and in the first week of the year, doing some point releases - upgrading the editor to Svelte 5, building a reasonably sized new feature that’s been requested and getting that ready to launch.
It continues to be a favourite project, and I’m glad that I’ve found a way to keep it going for more years to come, in a way I’m happy with.
Worknotes for March 2021: 'What is this prototype for?'
23 March 2021Last week I sent all the files necessary to build the first draft at my Ilkley prototype to China. That means the plotting files to make the circuit boards, the list of all the components on them, the positions of all the components. The factory’s going to make the circuit boards and attach most of the components for me.
This is good, because many of the components are tiny.
The Ilkley prototype is on two boards: a ‘brain’ board that contains the microcontroller and almost all the electronics, and a separate ‘control’ board that is just some IO and inputs - knobs, buttons. I am focusing on the brain right now: its “revision A” board is the right size and shape to go in our housing; the current prototype of the control board is just designed to sit on my desk.
About six hours after I sent it all off, I got an email: I’d designed around the wrong sized part. (I’d picked a 3mmx3mm QFN part instead of a 4mm square part, because that’s what had been auto-selected by the component library). This meant they couldn’t place the part on the board: it wouldn’t fit.
“Should we ignore the part and go ahead with assembly?“
At this point blood rushes to my head. That part is one of the reasons I’m not building it myself: it’s not really possibly to attach with a soldering iron, and I don’t have a better tool available at home. So maybe I should quickly redesign around the right part? I hammered out a new design in Kicad.
But now I’d have to send new files, new placements over, and probably start the order again. This was going to add delays, might not even be accepted by the fabricator, and so on.
Deep breath.
At this point, I took a step back, and had a cup of tea.
Over said tea, I made myself answer the question: what was this prototype for?
Was it only to test the functionality of that single chip that couldn’t be placed? The answer, of course, was no. There were lots of things it evaluated, and lots of things that could still be evaluated:
- many other sub-circuits - notably, a battery charger, a second amplifier, a mixer
- the integration with the ‘control board’ and the feasibility of my ribbon-cable prototype
- how several parts ended up being fitted, which the fabricator has not used for me before
- the fit/finish inside our final enclosure
- not to mention whether I’d made any other mistakes on the board.
So far on Ilkley, we have been lucky: every single first revision of our hardware’s worked. This doesn’t mean we’re brilliant at everything; it means nothing more than that we’re in credit with the gods of hardware. Something will go wrong at some point - that’s what
revision Bis for. All that had happened was I’d hit my first big snag.Prototypes aren’t about answering every question, but they’re rarely also about answering one. I usually teach people to scope them by being able to answer the question what is being prototyped here? - the goal being to understand what’s in scope and what is not. Temporarily, in the panic of a 4am email from China, I forgot to answer that question myself. It was good to be reminded how many variables were at play in that Revision A, if only to acknowledge how many things I have going on with that board.
I wrote back to the factory; ignore the part and proceed. We’d still learn a lot from the prototype, and revision B would contain, at a minimum, a new footprint for that 4mm QFN chip. I saved the hasty changes I’d made to the circuit board after the email in a new branch called
revision_b- which I’d return to working on once the final boards arrived.Weeks 241-243
20 August 2017In no particular order:
Selworthy is in at the bottom of the ‘writing a difficult feature’ hole. Lots of chipping away, testing, QAing, re-testing, and re-approaching the problem. By Week 243 I’d had a bit of a breakthrough – some things were pretty much there, and other problems were, at least, understood. I also spent some time – possibly more than I’d like, given my enthusiasm for operations – wrangling getting the whole stack spun up on Centos – we tend to use Ubuntu, but there were reasons. Seeing the whole stack – from Javascript polish right down to compiling forks of ffmpeg – gives you a bit of vertigo.
Thonk have ordered a second run of products from Foxfield, which is great news. I took an inventory of what parts I had, ordered some key bits of the BOM from China, some more from a few British suppliers, and started putting together what was needed for a Mouser order. I’m hoping to package this lot up by the beginning of September. I also wrote the first installment of Foxnotes – similar to these weeknotes, but more infrequent.
I’m running a course on circuit board design in October, over four evenings. I did some promotion of this, and have spent a decent chunk of time beginning to write the course itself – trying to get a feel for what it contains, what the balance between talking and doing is, how to structure learning across the four weeks, and triple-checking the demo circuit I’ll be going over. I also ordered various small prototypes to help me out with demonstrations.
The course is going well, I think – I’m beginning to see the shape of it, and to see places we we can extemporise or build on things we’ve learned. But I also need to remember how much space to leave for unknown unknowns – discussion, and questioning, and inevitable inertia of using software.
A good few weeks – busy, and outside Selworthy, running around a little. But when I look back at it here, there’s definitely forward momentum.
“Designing Circuit Boards” masterclass in London
2 August 2017I’m running a course called Designing Circuit Boards in central London in October.
Maybe you’ve looked at a tangle of jumper wires on a breadboard and wondered how to take your electronics project beyond that point. Perhaps you’ve got an installation made out of lots of Arduinos, shields, and breakout boards and you’d like to make it more reliable and easier to reproduce. Or if you’ve got a prototype on your desk that you’d like to take the first stages of manufacturing: this masterclass will give you the tools to embark on that process.
Over four evening sessions (about 90-120 minutes each), we’ll take a project on a breadboard and learn how to design and fabricate a two-layer printed circuit board for it. This is a pragmatic course: it doesn’t presume any knowledge of CAD software, or any formal electronics training. We’ll be learning techniques and approaches, not just how to drive a piece of software.
The course is what I’d call intermediate-level. Some very basic experience of electronics – perhaps some tinkering with microcontroller projects (eg Arduino) on breadboards – is about the level of experience you need to enter. Maybe you’ve made complete projects or installations out of such technology. But I’m assuming that most people will have no experience of circuit board design.
We’ll be using Autodesk EAGLE as our primary tool, because it’s cross-platform, well-supported by the maker community, and free for our purposes.
You can find out more and sign up at the Somerset House website.
And if you’ve got any questions, you can email me.